Simple Network Design With DNS Servers in Packet Tracer
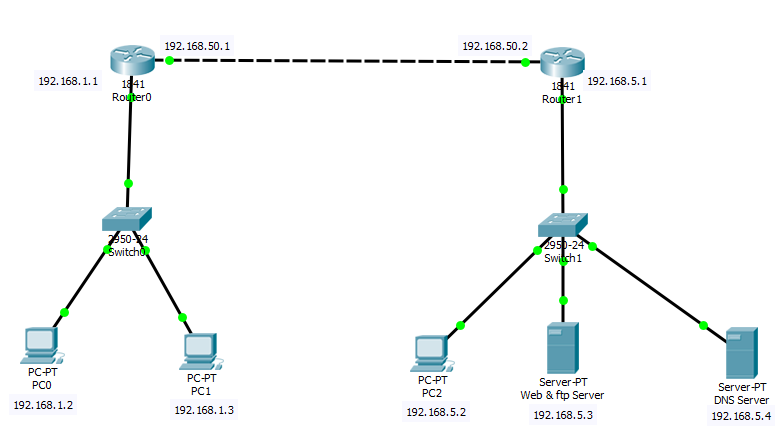
fig. Simple network with DNS and FTP server
We should use copper cross-over cable(dotted lines) to connect from router to router and copper straight-through cable(smooth line) to connect from router to switch and switch to end devices.
Here we are assuming the ip addresses as given in the figure above.
IP configuration:
We are configuring all the static ip. An example for PC0 is given in the figure below.
PC0
IP address: 192.168.1.2
Subnet Mask: 255.255.255.0
Default Gateway: 192.168.1.1
DNS Server: 192.168.5.4
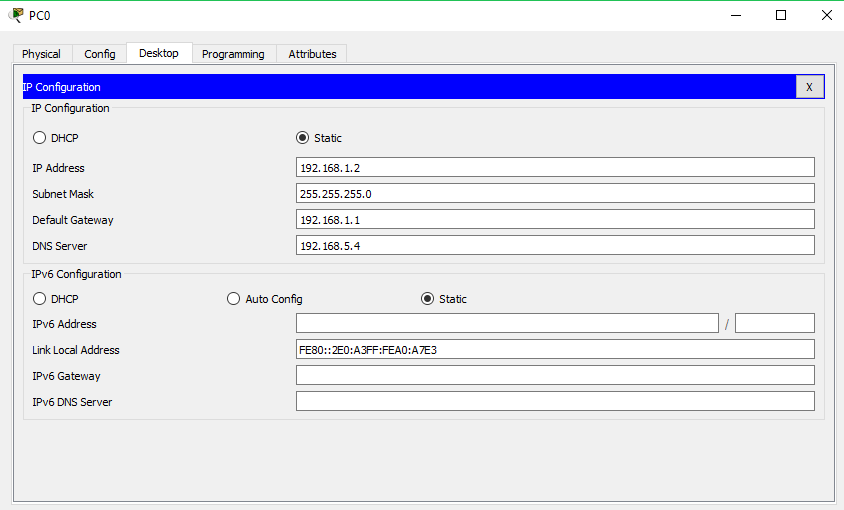
fig. IP configuration for PC0
In the same way, you can configure IP of all end devices as:
PC1
IP address: 192.168.1.3
Subnet Mask: 255.255.255.0
Default Gateway: 192.168.1.1
DNS Server: 192.168.5.4
PC2
IP address: 192.168.5.2
Subnet Mask: 255.255.255.0
Default Gateway: 192.168.5.1
DNS Server: 192.168.5.4
Web and FTP server
IP address: 192.168.5.3
Subnet Mask: 255.255.255.0
Default Gateway: 192.168.5.1
DNS Server
IP address: 192.168.5.4
Subnet Mask: 255.255.255.0
Default Gateway: 192.168.5.1
Make sure that we have not write DNS server to the Web, FTP and DNS server.
For Router
Router0 To Switch0
Ip address: 192.168.1.1
Subnet Mask: 255.255.255.0
 fig. An example figure for IP configuration of Router0 To Switch0
Router0 To Router1
Ip address: 192.168.50.1
Subnet Mask: 255.255.255.0
Router1 To Switch1
Ip address: 192.168.5.1
Subnet Mask: 255.255.255.0
Router1 To Router0
Ip address: 192.168.50.2
Subnet Mask: 255.255.255.0
For the network to communicate for different network, we have to set static routes at router. We can do that by clicking on the router and from the config option select static, and then configure as follows:
Static Route for Router0
Network: 192.168.5.0
Mask: 255.255.255.0
Next Hop: 192.168.50.2
And then click Add
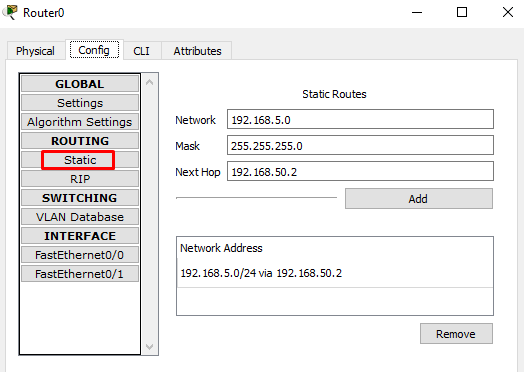 fig. Static Routes for Router0
Static Route for Router1
Network: 192.168.1.0
Mask: 255.255.255.0
Next Hop: 192.168.50.1
And then click Add
Now our network is complete. It’s time to test and enjoy.
DNS
Let us check if web server is pinging to PC1 or not. Go to terminal of PC1 and type ping 192.168.5.3
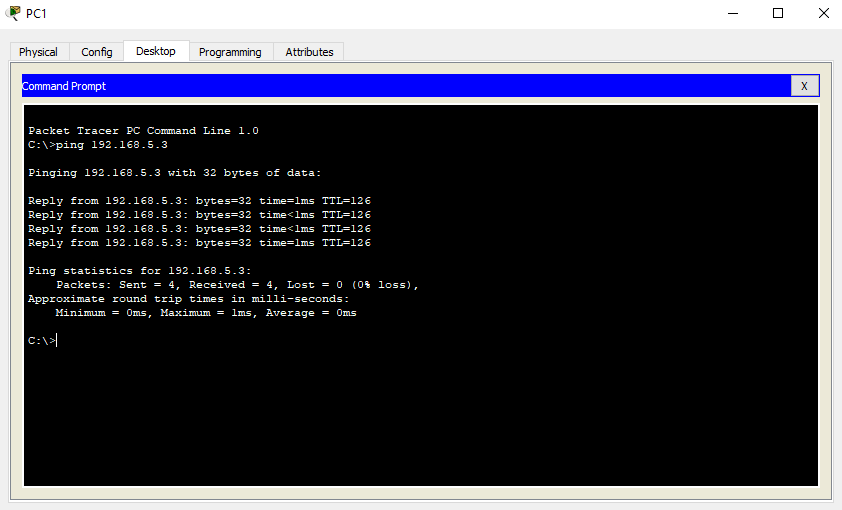
fig. Pinging web server from PC0
Let us check the files at web server. When we click web server and click services, we see that:
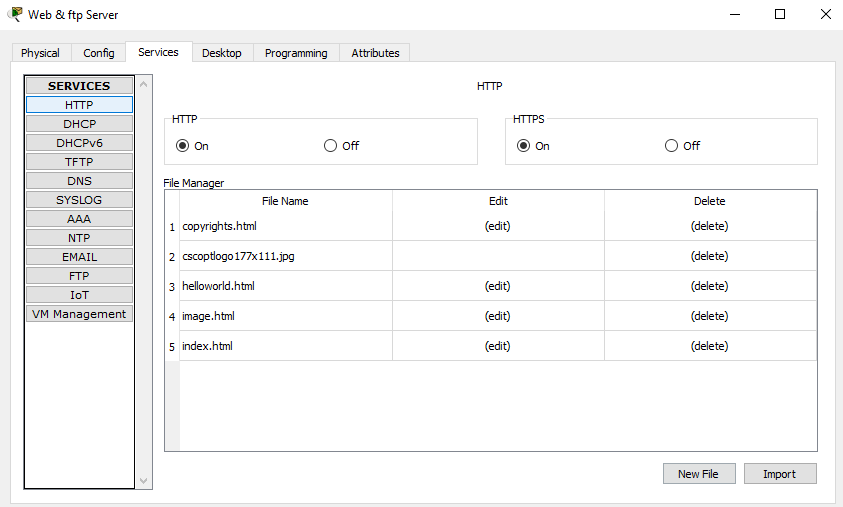
fig. Web Server files
Now, browse it from PC0. Click on PC0 and browse https://192.168.5.3, you will get the page like following:
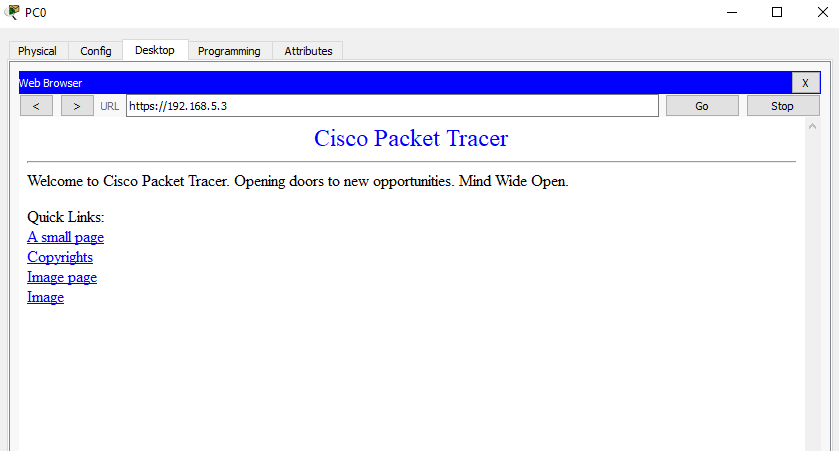
fig. Web browing from PC0 using IP address
If we want to browse files using custom domain. We have to configure custom domain to point to web server at DNS server. Here, I am using www.madhav.com (You can use your desired domain)
To do that follow the steps below:
- Click on
DNS server - Click
DNSfrom theservicesoption - Turn on
DNS Service - On
Resource Records:- Name:www.madhav.com, Type:A Record, Address:192.168.5.3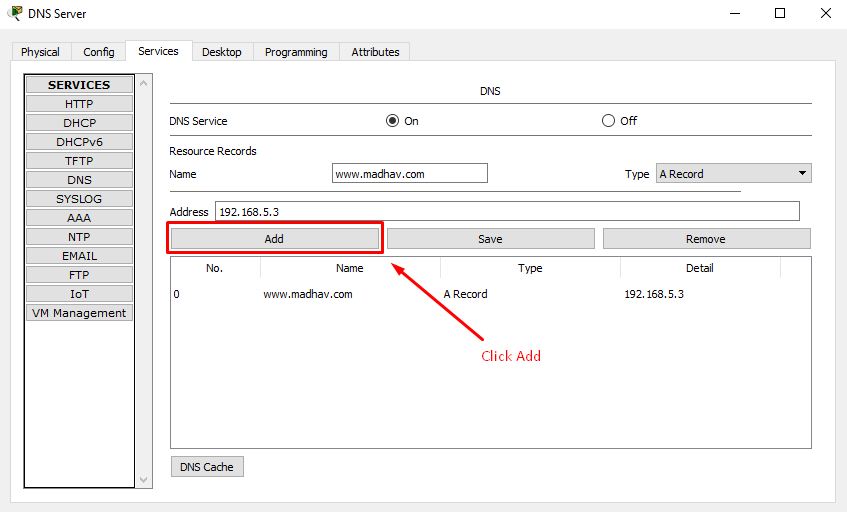
fig. DNS Configuration
Now, browse http://www.madhav.com, your site is now working.
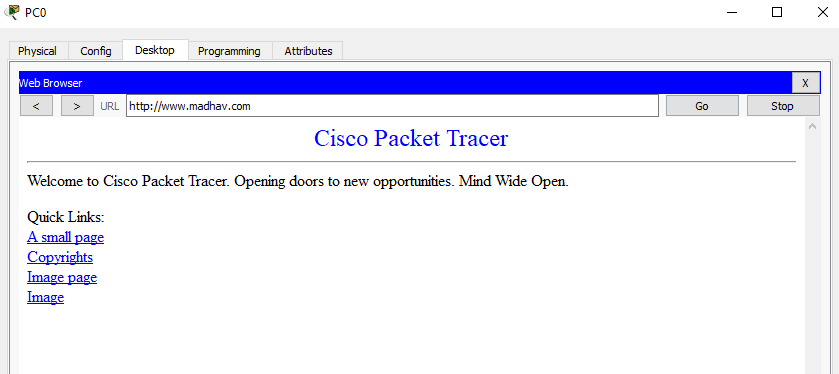
fig. Web browing from PC0 using custom domain
FTP
We have same server for FTP and DNS. To make ftp server, first make sure it is turned on. And then we need password to login ftp server. Default username is cisco and password is also cisco
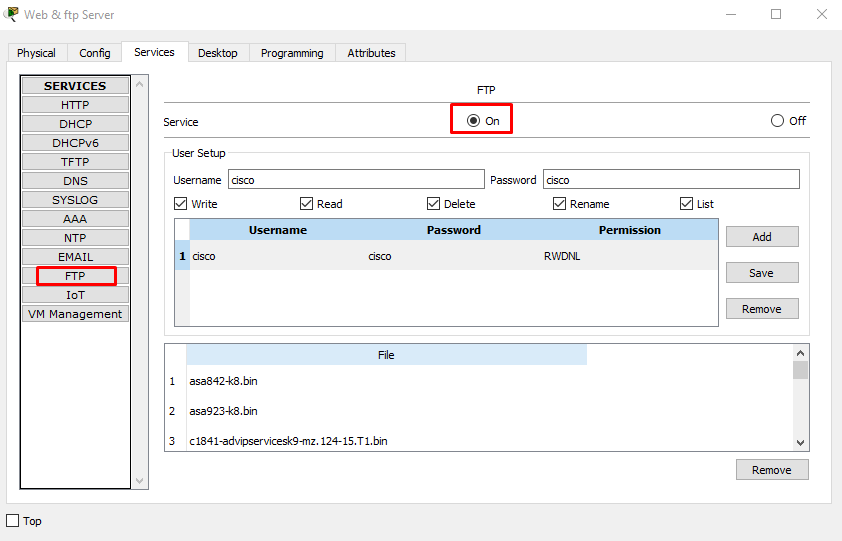
fig. FTP server
FTP GET
Now, extract the files from ftp server to PC0. Go to terminal of PC0 and login to ftp server:
ftp 192.168.5.3
username: cisco
password: cisco
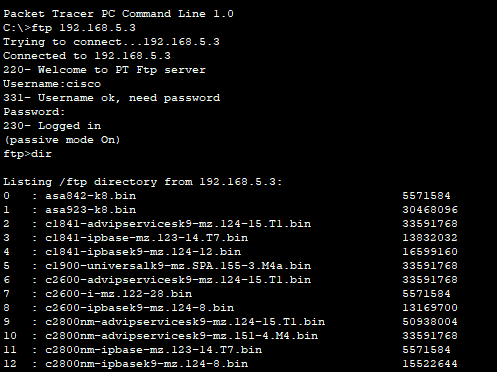 fig. FTP login
You can get the files of ftp using get <filename>
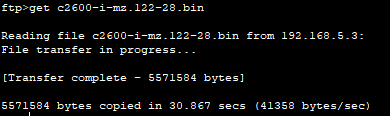 fig. FTP GET
FPT PUT
This means saving our files from computer to ftp server. We do this by using the command put <filename>
First, create a file going to PC0, I named it as madhav.txt
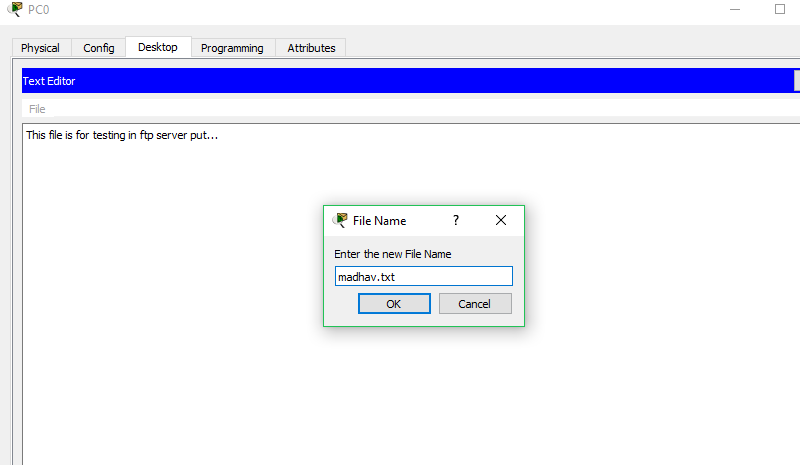
fig. Creating file in PC
Finally, put the file to server put madhav.txt
 fig. FTP PUT